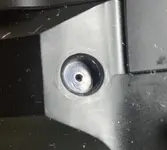
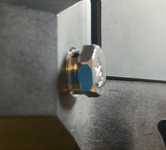
Install the app
How to install the app on iOS

Follow along with the video below to see how to install our site as a web app on your home screen.

Note: This feature may not be available in some browsers.

EVOL Evol .30 5000 psi Burst Disk Thread Pitch?

Wish those poly seals weren’t out of stock.

View attachment 2353View attachment 2354

If you look closely, you’ll see the damage to the reg body. I haven’t had it apart yet, frnakly, because I don’t know how, but it doesn’t look good.
It looks like it was dropped on disassembly at some point. The cast poly are out, but there's another type of poly that is similar that is in stock.
 
Last edited:
@American Air Arms I finally got a proper replacement burst disc from AoA and I followed all of the steps in this thread.
IMG_4360.jpeg

My Evol is still leaking around the new burst disc and I don’t mean a small leak. Before I filled the reservoir to 1000psi I could hear and feel air hissing from around the new burst disc. What now?
IMG_4361.jpeg
 
@American Air Arms Which method of cleaning the mating surface with acetone do you recommend? I used 3 Q-tips dipped in acetone. Perhaps I went about it incorrectly. Is there another method that I should try? With the Scotch Brite pad or Dremel/felt/Bore Brite is there something I should be mindful of to prevent exacerbating the issue?
 
I'm not sure without looking at it but sealing a burst disk should not be that challenging. If you can see any copper at the bottom sealing surface I'd try to remove with the Scotchbrite. If that doesn't take if off the then use the Dremel and polishing compound like the JB brite.

I once had a Slayer that came back that had visible copper traces stuck to the bottom of the bore. Once the copper was removed it sealed up just fine. Felt Dremel wheel was required for that one.

As an alternative you can send in for service.
 
Last edited:
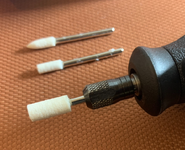
I’m finally getting around to cleaning this area out to see if I can remove any copper remaining on the sealing surface of the Evol. I haven’t touched this since posing my initial questions. I have some small grinder heads from a polishinf buffing wheel kit. These are not made of soft felt. They have a fine pumice feel to them. I also have some Clover Compound (250 grit) and some JB Bore Bright. I’m trying to determine which ones to use in which order. I’d also like to know what you all think the best method of clearing out debris from within the well that the burst disk screws into in the receiver. I’m thinking maybe a couple blasts of air (connecting fill port to SCBA tank and open/close the valve quickly a few times). I’m open to suggestions so that I don’t mess something up.
IMG_5298.jpeg
IMG_5300.jpeg

All three fit within the well. My primary concern is debris falling into the small hole in the bottom and cleaning that area out.
IMG_5303.jpeg
 

Attachments

  • IMG_5302.webp
    IMG_5302.webp
    377.1 KB · Views: 5
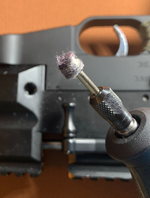
I’m thinking of starting at a low speed using this piece in the dremel first.

IMG_5306.webp
Here is how it fits without turning on the Dremel tool. I think it may be too wide and too close to the threads. What are your thoughts?
IMG_5308.webp
 
Last edited:
I read back and saw that Tom recommended using Bore Bright so that’s where I’ll start. I used a razor and cut one of the smaller felt wheels down a little shorter and then trimmed around the edges with scissors until it fit within the well in the receiver.

Original felt wheel
IMG_5314.jpeg

After trimming with scissors.
IMG_5313.jpeg
IMG_5315.jpeg
 
I’m thinking of starting at a low speed using this piece in the dremel first.

View attachment 7326
Here is how it fits without turning on the Dremel tool. I think it may be too wide and too close to the threads. What are your thoughts?
View attachment 7327
Do not use anything abrasive. Simple polishing compound on the very end of a cotton polishing attachment on that Dremel is best to smooth out the high spots of brass.
 
I read back and saw that Tom recommended upswing Bore Bright so that’s where I’ll start. I used a razor and cut one of the smaller felt wheels down a little shorter and then trimmed around the edges with scissors until it fit within the well in the receiver.

Original felt wheel
View attachment 7328

After trimming with scissors.
View attachment 7330
View attachment 7331
This is exactly what I would do. Polishing compound on the cotton/felt to smooth out things. Slow and easy to get you to the original anodized aluminum, or simply to smooth out the brass galling.
 
A blast of air backwards through the hole (from filling the cylinder and pushing air out from the receiver source side) will clear out most of the compound debris from the hole. And maybe use a whittled down toothpick to clean the side walls from any residue.
 
Ok. After a quick touch up of the surface, maybe 15 seconds here’s how it’s looking before cleaning compound from the surface.
IMG_5324.jpeg

Here’s the felt wheel.
IMG_5323.jpeg

After wiping off with a q-tip
IMG_5327.webp
 
The screw and bolts used in the Evol have a parts number and their measurements and sizes listed in the schematics on AAA site. When I went to look for the specifics on the burst disc, all I saw am was a part number C-035-0021-50. My question is, can I buy any old 5k burst disc or do I need to buy something specific as a replacement? I didn’t see this part listed on the AAA site.

I just order mine from Amazon and get in a few days. I always have a spare on hand.
 
Blew some HPA from my SCBA tank through there via connecting my fill line to the foster fill nipple and opened the valve.
IMG_5331.webp
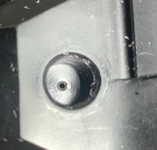
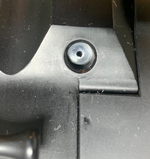
Here’s how it looks afterwards. I’m wondering if the crescent shaped indentation is an issue on the mating surface. I don’t know where that came from.
IMG_5329.webp
 
The manometer as I began filling and started hearing air escaping.
IMG_5341.webp
I can’t recall where I set down the black replacement burst disk that AOA sent me, but it’s still leaking from around this Captain O Ring burst disk.
IMG_5338.webp
I tightened it as much as I’m comfortable torquing in. I don’t want to kill it.
IMG_5340.webp

After snugging it down tightly. I could hear the air escaping. I got my fingers around the disk and felt the air against my skin.
IMG_5339.webp


This is very annoying. I guess I have to wait for the black burst disk turns up to try it. If that doesn’t work I have no idea where to work from here.

 
The manometer as I began filling and started hearing air escaping.
View attachment 7341
I can’t recall where I set down the black replacement burst disk that AOA sent me, but it’s still leaking from around this Captain O Ring burst disk.
View attachment 7340
I tightened it as much as I’m comfortable torquing in. I don’t want to kill it.
View attachment 7338

After snugging it down tightly. I could hear the air escaping. I got my fingers around the disk and felt the air against my skin.
View attachment 7339


This is very annoying. I guess I have to wait for the black burst disk turns up to try it. If that doesn’t work I have no idea where to work from here.
I'd buy one from Tom, or where he said to source them from. His burst disks are flat on the bottom. The Captain O-ring is more conical with less sealing surface area, and probably lead to the smashing in of the aluminum creating that crescent dent to begin with.
 

Create an account or login to comment

You must be a member in order to leave a comment

Create FREE account

Create a FREE account on our community. It's easy!

Log in

Already have an account? Log in here.

Trending in this forum

Back
Top