Install the app
How to install the app on iOS

Follow along with the video below to see how to install our site as a web app on your home screen.

Note: This feature may not be available in some browsers.

Marauder G3, The Things I Do For Fun

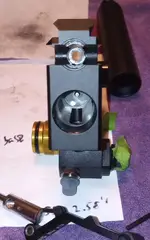
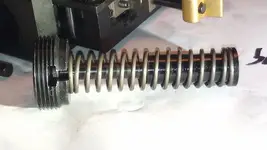
Decided to not take out the balanced valve. I have already seen pictures of it and removing it does nothing for me. It's in the HPA zone and this gun is lubed well and the machine work on this receiver is very nice, I haven't had to touch any of it. So, I took out the sidelever and probe, along with the SSG and hammer, removed the trigger block so that I could get out all of the oil in this area. I run my guns totally dry outside of the HPA zones. Oils and lubes only attract dirt and get sticky or change with the weather and increase your spreads. Everything gets covered in powdered graphite, that's it.

The SSG is really clever, and a clean design. The hammer is derlin with a steel face insert, much like what I have in my Gen2 mrod with its aluminum tube. I am going to put some teflon tape on the hs adjustment because it turns really easily. The trigger pack is mostly metal except one side of the pack has an access plate made of thick plastic. All the trigger parts are substantial. There's no tiny sears or anything. I might drill and tap in some extra set screws for extra adjustment , there's plenty of room and the parts are big enough to work on. I probably won't show that, or any trigger work, for obvious reasons, but if you're already into doing that kind of thing, this one looks like a good candidate. I have already adjusted the trigger to be very good but I think I could change the characteristics to be more to my liking. The pellet probe is finished beatifully. I thought that I would need to radius the inside, but nope, already done, nice job.

Still waiting on some parts to get back to finishing the stock so I might work on the trigger tomorrow. and now the pictures.

block.webp

ssg2.webp

ssg3.webp

probe.webp

Less glare.
p2.webp

insideb.webp
 
No pictures today. Nothing you haven't seen, just polishing the barrel and I put the gun back together. I left the barrel off for now.

When putting the plenum, with the regulator installed, back onto the block you have to make sure that they are clocked to each other. In my case, it has to be perfectly, or the bottle will touch because I've only got paper thick clearance between the stock and the bottle. The plenum is clocked at assembly with rubber and plastic washers, very well too. I had dropped a very thin plastic clocking washer and had't realized it and it was way off. Once I noticed it was missing I looked for it and actually found it right under my chair, got lucky on that one. I mention this only because you don't actually need to use the washers. Much like other bottle guns with guages on bottle-end regulators you can just clock your regulator block to your receiver block without actually tightening them all the way down. You just tighten down as much as you can and then back off enough to match and then fill your gun with air and the pressure will hold it in place. I have to do that with my Gauntlet so I know it works. Benjamin's washers worked perfectly for me and my bottle passed the paper test. I'm pretty happy about that.

Here is the big news of the day. I saved it until now so only people interested enough to read this far will see it. I am only mentioning this because I actually did nothing to the gun that I can't actually change back in a minute flat. I am of course talking about the trigger. First off, I think the trigger's side plate should be clear lexan so that you can watch what's happening when you adjust it, instead of black plastic. I mentioned that to @BenjeneerJohn and he said that they actually use a clear one at the factory but never thought to just send the trigger out with those. I thought that was pretty funny! Anyways, I adjusted my trigger with the plate off to what looked good to me, and it ended up being very good. It ended up being very good though becuse it was much lighter. I had originally had it adjusted down to 24oz which wasn't bad but it was all up front and I couldn't get the weight down any more. Looking at everything, I decided to put a lighter spring in, that's it. I did not stone or sand any parts or change anything else. I just took out one little spring and put in a slightly less stiff one. If there is a disadvantage to this or a safety issue, I don't know, but it's my gun and I'll do what I want, and pay the price. If you don't feel the same way, then don't touch yours at all, it's totally acceptable as is. And no I don't have any specifics on spring type or rate or even cut length and if I did it wouldn't matter because every gun is different, you have to know what you are doing and figure out that stuff for yourself. My trigger didn't actually change that much weight wise but I got a true lower first stage now. It is now 14oz first stage and 18oz second and the travel isn't bad either, I'm leaving it. Don't do anything at all to your trigger if you consider it any kind of a risk. I only decided to mention this because I am grateful that someone was kind enough to post about the "Lawyer Spring" in my Gen2 Marauder, and how to disable it, to end up with a truly great trigger, so I'm paying it forward. I'm not suggesting that you do anything, just commenting on what I did.

Tomorrow, I get back to installing my Arca Swiss plate.
 
I'm getting ready this morning, to work on the G3 again, and looking at it in the morning light I decided that the color of the stock, and it's low sheen, is actually very nice. I am not going to paint it, well, not all of it. It matches the bottle so well, I don't think paint would do much more than distract, because I don't want to paint a carbon fiber bottle. The only change that I am going to make to the finish is the other thing I noticed that stood out a little bit too much and that is the shine coming from inside the honeycomb grip design. I am going to tape off those areas, and the cheek piece, and do a very quick bead blast, and then paint them a satin black. That's it.

All of that will wait for the Arca rail project to be over because that is going to look like a battlezone and need some paint too. Believe it or not, I'd rather fit two carbon fiber bottles to a stock, like I did, than mount an Arca Swiss rail. It's actually more work to get right and the setup is way longer. Before I had ever done both, I never would have thought that either. Live and learn.
 

Create an account or login to comment

You must be a member in order to leave a comment

Create FREE account

Create a FREE account on our community. It's easy!

Log in

Already have an account? Log in here.

Trending in this forum

Back
Top