Install the app
How to install the app on iOS

Follow along with the video below to see how to install our site as a web app on your home screen.

Note: This feature may not be available in some browsers.

PCP Raising a “Standard” (JTS Airacuda)

I still have not had it to the Range. Heat should break tonight. It's fine, holding Air after the foster fitting rebuild and Hammer spring adjustment.
I do like the way the gun shoots standing and sitting. But yeah FL22 it's great, just went downstairs and checked the pressure. It's right where I left it at 2000 psi.
I'm thinking this Friday and this coming Monday to get a couple days of Range time in.
I'm dissatisfied with the Tactical Bore Site and very satisfied with the cheap $21 trigger pull gauge from Amazon.
That’s good to hear 👍.

I plan to do some trigger work on mine if I can, time permitting.

I adjusted the trigger on two of my airguns but never had to adjust or polish the trigger on any other gun I’ve ever owned.

Maybe @Pumacarl could offer some sage advice.
 
My advice on trigger work, if you have never done it or been around watching when someone else has, is to find videos and watch them. More importantly than that, listen to what the guy is saying when he is doing his thing because what's actually going on might not show up on screen. Don't watch videos in a foreign language, or mute them. Google translate doesn't always work that great for technical operations either. Watch a lot, like maybe make it a thing to watch a couple a night for a week or two. You will soon be able to tell who is full of $h!t and who is a hack. Take note of their tools and their workspace too, and read the comment section if it is turned on, it can be gold. If it's there, check out the websites that they follow, so you can get a feel for where they are getting their information from, standard procedure, for everything, really. And don't just look for airgun triggers, learn about all or any, because they all do the same thing, except electronic ones, I have yet to do that myself. Good luck!
 
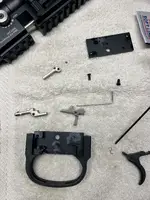
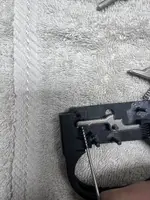
I completed my trigger work tonight.

IMG_3053.webpIMG_3054.webpIMG_3055.webpIMG_3056.webpIMG_3057.webpIMG_3058.webpIMG_3059.webp

I used Molly lube on all the posts and that seemed to get rid of the grittiness.

I adjusted everything and the trigger still felt too hard so I trimmed the spring down. I did that very cautiously just cutting a very small piece at a time.

Everything is back together and I tested it degassed, cocked hit it with a rubber mallet to ensure it’s safe, no accidental firing.
 
Very nice, good job! Always best to start with a good good clean and lubricants. Many people start right off with stones or sandpaper, and unless you really know them, things can go south fast. If you don't have one, a trigger guage is really nice to have. You don't need a Lyman digital one either, the Wheeler spring one ($20) I checked against a Lyman and it's within an ounce.
 
Very nice, good job! Always best to start with a good good clean and lubricants. Many people start right off with stones or sandpaper, and unless you really know them, things can go south fast. If you don't have one, a trigger guage is really nice to have. You don't need a Lyman digital one either, the Wheeler spring one ($20) I checked against a Lyman and it's within an ounce.
Thank you Sir.

I did watch several vids, but after taking it apart, I decided that for me trying to do anything more than cleaning and greasing the metal to metal contact areas would be a mistake.

I will definitely check into the Wheeler spring gauge 👍.
 
I completed my trigger work tonight.

View attachment 15083View attachment 15084View attachment 15085View attachment 15086View attachment 15087View attachment 15088View attachment 15089

I used Molly lube on all the posts and that seemed to get rid of the grittiness.

I adjusted everything and the trigger still felt too hard so I trimmed the spring down. I did that very cautiously just cutting a very small piece at a time.

Everything is back together and I tested it degassed, cocked hit it with a rubber mallet to ensure it’s safe, no accidental firing.
That was really good. I won't hesitate to get into mine if I have to.
 
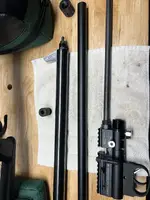
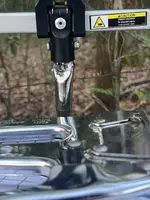
Polished the barrel today and inspected the hpa tube. The only surprises I found was how loose both ends of the tube were, just finger tight.

Can’t believe it wasn’t leaking.

IMG_3060.webpIMG_3061.webpIMG_3063.webp

I put everything back together, my acquisition today has put this project on hold for a while $ wise any way.

I still plan on adjusting the hammer spring now that I have a crono.
 
Last edited:
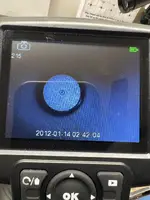
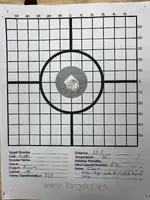
When I put the scope back on and was checking it for zero, see if you can find where the pellet went lol.

View attachment 15127

I thought it hit the clipboard.

View attachment 15128
Well shoot, I was reading your second last post and was gonna reply with a "Wow, you're killing it!" (with your work on the Jts) but now that would be sensitive/inappropriate?😁 RIP.
I was halfway through tuning my Slavia springer last year when my Ghost showed up....yaaa the Slavia got ignored for a bit there. You often don't need to spend coin to make airguns better, just some work! As for trigger/sear polishing if you feel the need I'd recommend a 2inch air sander. Run a buffing pad on it and go slowwww. Looking good so far!
 
Well shoot, I was reading your second last post and was gonna reply with a "Wow, you're killing it!" (with your work on the Jts) but now that would be sensitive/inappropriate?😁 RIP.
I was halfway through my Slavia springer last year when my Ghost showed up....yaaa the Slavia got ignored for a bit there. You often don't need to always spend the coin to make airguns better, just some work! As for trigger/sear polishing if you feel the need I'd recommend a 2inch air sander. Run a buffing pad on it and go slowwww. Looking good so far!
😂 good one.

As far as the trigger goes, I wish there was a way that I could make it feel less vague. It also has too much lateral movement.

I probably need to try some different springs and maybe some very thin washers.

It went from gritty to sloppy.
 
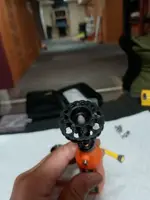
Important: I order 2 packs of (what I think is new) JTS .22 magazines. They arrived and well...plain and simple they don't work shipped as is. Picture 1 shows how they came home from the field. Only 1 mag shot all pellets, the others only turn manually
The screw is the only adjustment. So when you cock the rifle, they cycle so slowly...maybe even 5 seconds at times. They feel cheep as you open them, and even cheaper when you try and use them. Dry fire all over the place, I almost threw them in the trash..
I'll take one apart, take pictures and see what you guys think, if anything we can do to make them work.
 

Attachments

  • IMG_20250808_201940359_HDR.webp
    IMG_20250808_201940359_HDR.webp
    126.3 KB · Views: 7
  • IMG_20250808_201640824.webp
    IMG_20250808_201640824.webp
    101.7 KB · Views: 7
  • IMG_20250807_140344898.webp
    IMG_20250807_140344898.webp
    241.1 KB · Views: 7
Important: I order 2 packs of (what I think is new) JTS .22 magazines. They arrived and well...plain and simple they don't work shipped as is. Picture 1 shows how they came home from the field. Only 1 mag shot all pellets, the others only turn manually
The screw is the only adjustment. So when you cock the rifle, they cycle so slowly...maybe even 5 seconds at times. They feel cheep as you open them, and even cheaper when you try and use them. Dry fire all over the place, I almost threw them in the trash..
I'll take one apart, take pictures and see what you guys think, if anything we can do to make them work.
Probably very similar to this.

To view this content we will need your consent to set third party cookies.
For more detailed information, see our cookies page.
 
"The only surprises I found was how loose both ends of the tube were,"
That's good. They don't have to be tight, the orings do all the air sealing in a pcp. Bottle guns don't need their bottles screwed in tightly either, on many you have to unscrew a little to get the fill nipple and air guage lined up, the air pressure makes it rigid and the oring holds the air, not threading the thing in tightly. I never tighten my air cylinders more than snug, with a light grip, also.
 
Important: I order 2 packs of (what I think is new) JTS .22 magazines. They arrived and well...plain and simple they don't work shipped as is. Picture 1 shows how they came home from the field. Only 1 mag shot all pellets, the others only turn manually
The screw is the only adjustment. So when you cock the rifle, they cycle so slowly...maybe even 5 seconds at times. They feel cheep as you open them, and even cheaper when you try and use them. Dry fire all over the place, I almost threw them in the trash..
I'll take one apart, take pictures and see what you guys think, if anything we can do to make them work.
Yeesh they seem a little rough! If u want something better (by alot) check out Maple Custom Mags. They make em for the Jts guns, good prices and Tarrif free😎
 
Those springs are a bear to get back in the holes.
It looks like the problem is the hole(image 432251) is so tight over the shaft that the screw goes into. After Dremel used, and directions followed on the video they do seem to work better.
These don't have the metal sleeve for the screw and the stop pin for the magazine is plastic.
I was supposed to have 2 metal ones arriving yesterday, so maybe today.
 

Attachments

  • IMG_20250809_043225184.webp
    IMG_20250809_043225184.webp
    57.9 KB · Views: 6
  • IMG_20250809_043141437.webp
    IMG_20250809_043141437.webp
    85.8 KB · Views: 6
  • IMG_20250809_040804265.webp
    IMG_20250809_040804265.webp
    68.3 KB · Views: 5
Wake up dead thread‼️ lol

Since my recent work with my Sniper went well I have spent a few days on the Airacuda, as it hasn’t been doing too well lately.

Lost power and shot count 🙁. 20 shots in the low 800s and done.
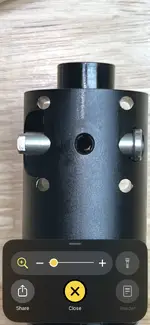
Here is some things that I found, probably normal basic stuff.

O-ring at the firing valve and just the tiniest obstruction of the power adjuster.

Probably the biggest thing I decided to do is adjust the valve spring, I made measurements of everything before and it’s as easy as most internal regs, just degas and unscrew the tube to adjust.

I backed it off 2mm and set the hammer back to where I had it when I first tried tuning it to compare numbers. IMG_3598.webp

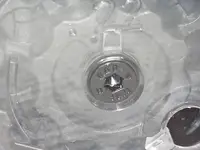
Power adjuster before,

IMG_3608.webp
IMG_3602.webp

And after,

IMG_3607.webp
IMG_3605.webp
I still did it with my cordless drill but on low and very slowly, it bounded up several times but I was able to back off. It was actually a lot of work sanding and some polishing, especially around the edges. The tolerance for this was very tight I spent an hour on it just to get it back in place.

Hopefully I get a chance tomorrow to see what the changes/improvements that I made amount to 🤞.
 

Create an account or login to comment

You must be a member in order to leave a comment

Create FREE account

Create a FREE account on our community. It's easy!

Log in

Already have an account? Log in here.

Trending in this forum

Back
Top