Install the app
How to install the app on iOS

Follow along with the video below to see how to install our site as a web app on your home screen.

Note: This feature may not be available in some browsers.

250Z 250z - Working On It!

Pumacarl

Grand HAMster
3,353
12,786
HAM Points
13,441.50
Country flag
I'm carrying this over from the MountainSportAirguns review thread where I started to detail what my experience has been so far.

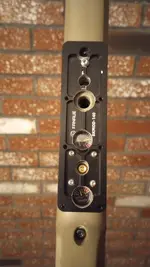
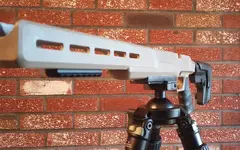
Now that I have the gun functioning, I have started work on adding a arca swiss rail. It looks more like swiss cheese with all the holes I've drilled in it!


arcadrilled.webp

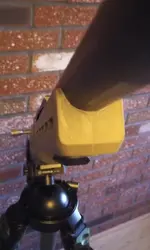
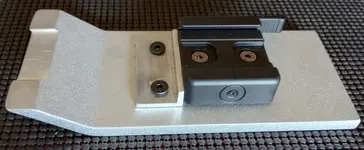
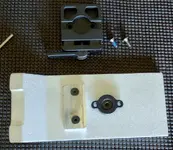
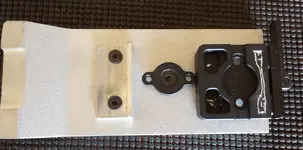
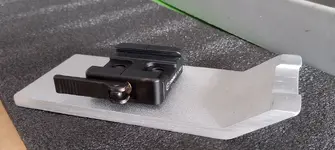
I also started working on a arca swiss bag rider too. This is turning out to be very cool! I used a heavy piece of aluminum from an old computer monitor stand and cut it to size. I put in a groove on the upswept front that the arca swiss rail actually sits in that stops anything from sliding between the rail and the rider mount. I plan on putting rubberized tape on the bottom for grip.
arcabagrider.webp

I am going to be working on securing the arca plate to the stock this weekend. My slugs haven't arrived yet, so i will make use of the time.

I hope that when I eventually shoot this thing that it is as accurate as everyone else's.

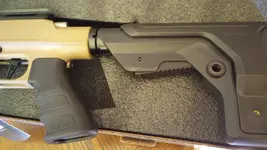
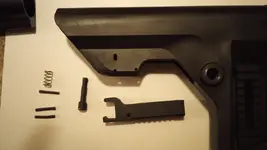
Here are some pictures of what my stock looked like in the box, and after I (tried) straightened the pins out, before i put it back together:
brokestock.webp

stockpins.webp

It is interesting stuff to do.
 
That bag rider weighs 14 ounces! Pretty heavy for aluminum. The gun, scoped up, weighs 10 pounds, with that bag rider, close to 11lbs. Should be all kinds of stable for long range plinking, especially considering it's length.

My NSA slugs showed up today. Depending on the weather tomorrow, I might just shoot. Figuring out a good way to secure that Arca plate is not so straight forward. The problem is which hardware to use and what is available. I am going to have to spend some time in a hardware store before I settle on anything. I am thinking about multiple JB Weld sessions to firm up the base before securing it down. The most tedious part of everything I am doing for sure.
 
I'm carrying this over from the MountainSportAirguns review thread where I started to detail what my experience has been so far.

Now that I have the gun functioning, I have started work on adding a arca swiss rail. It looks more like swiss cheese with all the holes I've drilled in it!


View attachment 10060

I also started working on a arca swiss bag rider too. This is turning out to be very cool! I used a heavy piece of aluminum from an old computer monitor stand and cut it to size. I put in a groove on the upswept front that the arca swiss rail actually sits in that stops anything from sliding between the rail and the rider mount. I plan on putting rubberized tape on the bottom for grip.

View attachment 10061

I am going to be working on securing the arca plate to the stock this weekend. My slugs haven't arrived yet, so i will make use of the time.

I hope that when I eventually shoot this thing that it is as accurate as everyone else's.

Here are some pictures of what my stock looked like in the box, and after I (tried) straightened the pins out, before i put it back together:

View attachment 10062

View attachment 10063

It is interesting stuff to do.
Great work on the 250z so far!
 
I just today noticed an email from Barra today basically thanking me for not sending the gun back and they sent me a spare magazine gratis! Nice, I haven't gotten anything like that in a while. They also replied to my question on where the fill plug is. They are working on something and they have heard the many complaints. Good too. He also commented, for all of you waiting out there, that they do have spare magazines now, they just haven't been posted to the website yet.
 
Last edited:
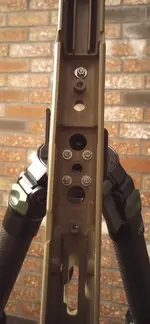
The hard part is done. I finally figured out a decent way to attach the plate that is fairly strong. The front screw is an M4 and is in the thickest part of the stock, so I know that is plenty strong. There is a nice and big dead space there, so that was easy. Towards the trigger there is just about no room to do much of anything substantial, and the bottom is thinner. I could just squeeze in M3's around the regulator, and because they are smaller, I used four. I had to cut them down so nothing stuck up, it's tight in there.

Before I did any of this I needed the plate to be steadier so I got some JB Weld Steel Stick and made some pencil thick pieces to bed the plate to the stock. I covered the bottom like a ladder pattern , to get both sides and between the guage and fill holes. That stuff sets fast, so I gave myself three minutes, one minute to mix it, one minute to shape it, and one minute to apply. I set a timer but I didn't need it, I could tell it was setting up fast without having to watch a clock. I had gotten the plate ready by taking a dremel with a cutting wheel and putting deep cuts along the center beam to make mechanical locks to hold the JB to the plate and I roughed up the surface with sandpaper. I like using regular JB Weld usually, but this scenario just lent itself better to a faster method. It came out OK, but I will do a second application later to make it look better, before I paint the stock.

I did waste quite a bit of time attempting to use the small M3 threaded holes already on the plate for arca plate stops. They are very close to the edge, so I thought that it would be super stable to use them. Turns out they are too close to the inside of the stock when I drilled through. I knew they'd be close, but I thought that I could get it to work, but no dice. Luckily, I only drilled one hole.

arcabolted.jpgthrubolts.jpg

sidejbw.jpg

Now I will be mulling over how much of this thing that I want to paint. I am also going to through bolt a pic rail on the front. I don't trust M-lok connected to plastic. I am going to use a piece of steel as a backer. Next weekend!
 
Last edited:
picrail.jpg

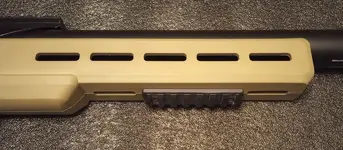
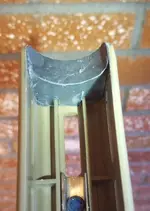
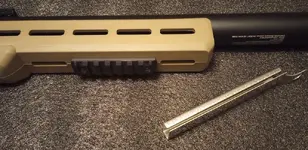
I installed a picatinny rail. Well. I am not impressed with how M-Lok works on a good aluminum chassis, on plastic - forget it. So I was looking for a solid solution and stumbled on a pretty good one.

picrailsol.jpg

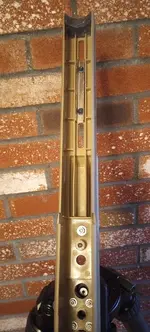
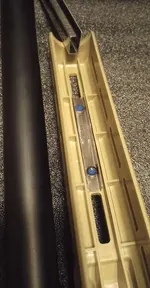
I had some left over parts from re-building my grill, this part is 304 Stainless Steel, thick and strong. It also fits quite nicely inside the track on the bottom of the stock, once cut into a "U" channel.

picrailbacker.jpg

I cut it using a cut-off wheel on a dremel, this steel is hard, and it takes hardened high speed drill bits to drill too. I drilled the holes precisely where they needed to be, and shaped in an oval using a diamond bit in a dremel to get the M-Lok nut to fit exactly into it. The lip of the M-Lok nut is fully engaging the SS plate. This setup is strong, I could hang off of it, if the stock could take it.

The bottom of the stock looks flat, but is just slightly not, and when I put the flat of the rail bottom on it, it rocked a little bit, so I sanded in a very minor radius on the mounting surface before attaching it. It sits rock solid, and with the backer plate and the bolts not being able to move, or even twist, I don't have to worry about this setup at all.
 
View attachment 10137

I installed a picatinny rail. Well. I am not impressed with how M-Lok works on a good aluminum chassis, on plastic - forget it. So I was looking for a solid solution and stumbled on a pretty good one.

View attachment 10138

I had some left over parts from re-building my grill, this part is 304 Stainless Steel, thick and strong. It also fits quite nicely inside the track on the bottom of the stock, once cut into a "U" channel.

View attachment 10140

I cut it using a cut-off wheel on a dremel, this steel is hard, and it takes hardened high speed drill bits to drill too. I drilled the holes precisely where they needed to be, and shaped in an oval using a diamond bit in a dremel to get the M-Lok nut to fit exactly into it. The lip of the M-Lok nut is fully engaging the SS plate. This setup is strong, I could hag off of it, if the stock could take it.

The bottom of the stock looks flat, but is just slightly not, and when I put the flat of the rail bottom on it, it rocked a little bit, so I sanded in a very minor radius on the mounting surface before attaching it. It sits rock solid, and with the backer plate and the bolts not being able to move, or even twist, I don't have to worry about this setup at all.
That setup is rock solid brother. Nice job!
 
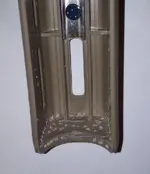
The problem:
gap.webp

I don't like that gap.

The prep:
roughing.webp
I took a dremel to put some mechachanical locks for the JB SteelStik. JB SS sets up so fast that I needed a plan to place it where it needs to go fast enough so that I can place the gun before it sets. This stuff is basicallly unworkable after only four minutes.

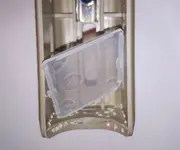
The solution:
plasticorg.webp

This is an organizer tray plastic spacer which I will form to fit in place to use as a fast dam to just put behind a blob of epoxy and push it into place quickly, and I will just leave it if it sticks because it won't be in the way or hurting anything.

The fit:
plasticdam.webp

I won't be making quite that thick, but you get the idea.

To be continued...
 
Filled:
epoxiedbed.webp

Mixed up and threw in a big blob of JB and placed a ribbon of it on the stocks shelf, pushed the plastic plate up against it, did a quick trim of the excess, and placed the gun. I am going to just leave the backer plate of plastic.

Inside work is done:

insidedone.webp

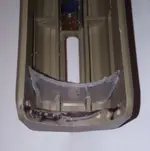
Gap gone:

gapclosed.webp

Time to make the arca plate bedding look a little cleaner around the stock. I am just going to try small batches of thin strands of the JB and see if I can smooth it out, otherwise the paint job is going to have to hide the mess.
 
Filled:
View attachment 10213

Mixed up and threw in a big blob of JB and placed a ribbon of it on the stocks shelf, pushed the plastic plate up against it, did a quick trim of the excess, and placed the gun. I am going to just leave the backer plate of plastic.

Inside work is done:

View attachment 10214

Gap gone:

View attachment 10215

Time to make the arca plate bedding look a little cleaner around the stock. I am just going to try small batches of thin strands of the JB and see if I can smooth it out, otherwise the paint job is going to have to hide the mess.
Coming along nicely! Well done man.
 
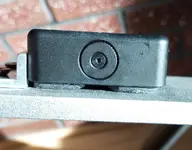
Thanks! I did some work on my bag rider too. I had to add a piece of angle stock to the front of the clamp to prevent the whole thing from spinning. I"m having problems countersinking the aluminum, and need to borrow a countersink bit from my brother to continue. I am going to put some JB under the arca clamp too, to strengthen it from abuse. There is only one screw holding it down because it was just made to screw down onto a tripod head. I am really liking using JB Steel Stik over traditional JB Weld, as long as I plan the whole thing out ahead of time, it seems to go much better. I know that it is probably only 70% as good as the original, but it's probably going to be just fine for how I treat my stuff.
 
The re-do to clean up the look of the arca swiss plate bedding came out OK, nothing paint won't hide:

redoepoxasr.webp

While I was playing with the epoxy I gave the bottom of the bag rider extra stability by putting some under it too. That, combined with the anti-swivel angle stock in front of the mount should secure it quite nicely. The way it mounted up an 1/8th" from the base wasn't going to fly with me. I still have to countersink those angle stock screws.

antiswivel.webp

ptbalasr.webpscoringmount.webp

feetasr.webp

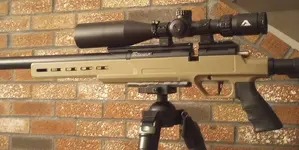
Paint time, pretty much. I am not painting the scope or my suppressors, I swap them around too often to bother with that. I don't want to go nuts on the paint, I just don't like black on guns because I think the contrast stands out more than just about any color other than the neon ones. I will be playing that by ear. No plan. I rarely like how painting turns out so I'd rather not say that I planned it. I can't be dissappointed, just surprised. I am spraying on very little anyways. It will get a battle-worn look really fast. I can always hit it again.
 
Last edited:
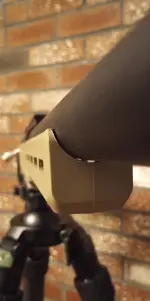
Had an unusually beautiful day yesterday and took advantage and painted the 250z. I am glad at this point that I did not get the factory camo stock because I probably wouldn't have bothered. It was worth bothering. Rattle-canning it I got to get rid of the aweful looking all-black stock and the barrel has a really cool bruised camo look that I won't have to wrap in a ton of ace-bandaid camo tape. The paint can said, that on plastic, it takes 5-7 days to fully cure so it will be a while before I put it back together.

a bad pic of the barel:
barrelbruisedcamo.webp

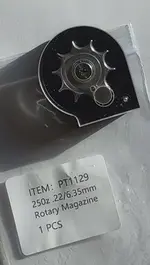
The free magazine that Barra sent me arrived today and it is the wrong size. They sent me a .25, but it is more convoluted than what you might think. The packaging on the magazine says ".22/6.35mm." I know that the people reading this are airgunners, and will say, "Huh?", as did I. I told Barra, when they told me that they were sending me a .22/6.35mm magazine, that it didn't make any sense because .22 is 5.5mm and .25 is 6.35mm, so why does the item read .22/6.35mm? They chose not to reply to that question and I got a .25 cal magazine. What can I say, it was a freebie, but it is a strange mistake, especially to have printed out that label, any airgunner would have instantly recognized it as being incorrect. (I will edit and attach a picture in a moment.) All this to say, if you order a magazine from them, be sure to call them and tell them to check them because they are marked incorrectly.

mismarkedmag.jpg

For those that forgot, I bought a .22 from them. The magazine in the picture is a .25.
 

Create an account or login to comment

You must be a member in order to leave a comment

Create FREE account

Create a FREE account on our community. It's easy!

Log in

Already have an account? Log in here.

Trending in this forum

Back
Top